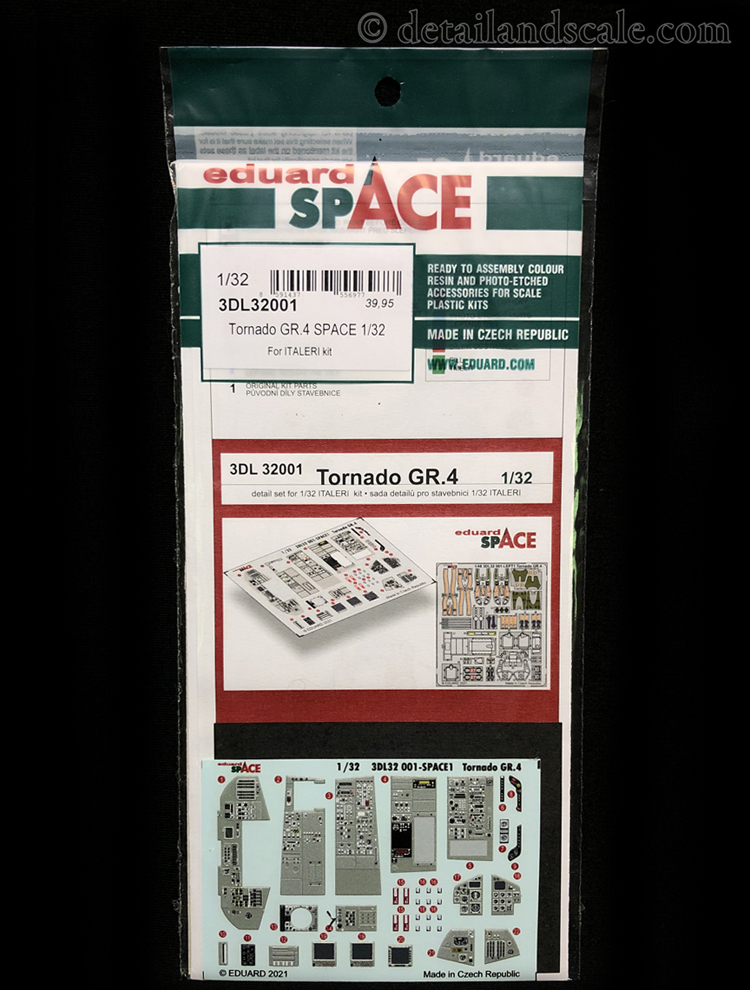
Eduard # 3DL32001- Tornado Gr.4 SPACE (for the Italeri kit) — 1:32 Scale

In 2021, Eduard launched their line of 3D printed detail sets under the new “SPACE” product line. Here, we review their SPACE set for the 1:32 scale Italeri Tornado GR.4. Released in 2020, the 1:32 scale Italeri kit of the RAF’s Tornado GR.4 has been pretty popular and relatively well reviewed (though some folks have encountered some tricky fits). Just out of the box, the kit’s cockpit is good, however, this set aims to provide super-detailed parts to elevate the quality and appeal of this large-scale kit cockpit even further.
In this set, (Tornado GR.4 SPACE, #3DL32001; MSRP: $39.95), the scale modeler will find thirty-six 3D printed parts on a section of decal sheet and fifty-four additional photoetched metal parts on a single fret. The 3D printed parts include all the elements for the pilot and navigator/weapons officer’s instrument panels, side consoles, throttle quadrant, wing sweep selector, a few sidewall details, and the ejection seat warning placards found on the sides of the ejection seat headboxes.
The photoetched metal fret contains parts for the Martin-Baker Mk. 10 ejection seat shoulder harnesses, lap belts, leg restraints, and backpad details (which are quite complex overall), ejection handles, and various other cockpit details.
This set appears to be excellent. Not only is it a complete cockpit and ejection seat upgrade, but the quality of 3D printing is sharp. All the buttons are represented as finely raised features, and various instrument dial faces feature very finely printed details. Each glass dial face or display screen is treated with Eduard’s “glass effect” to produce just a perfectly smooth and glossy surface. The SPACE line also combines these 3D parts with Eduard’s signature photoetched metal parts, which cover those items or details best represented by that medium. It’s a winning combination that is hard to beat.
A note on working with 3D parts: these are polymerized vinyl parts, printed directly onto a piece of traditional decal paper. First, and just like using photoetched parts, one must often remove kit cockpit details and sand panels and consoles smooth. Second, dip these parts in water as a traditional water-slide decal. They will soon slide off the decal paper and be ready to place. Since these are thick “decals” made out of vinyl, they are best affixed to the kit parts using a PVC-type glue, a little Future/Pledge floor wax, Tamiya X-22, Microscale’s Metal Foil adhesive, or superglue applied with a thin micro-loop. The smaller 3D decal parts are more amenable to being affixed using just a little superglue. DO NOT use standard decal setting or solvent solutions, as they will dissolve the part and ruin your day.
For the value and detail that it brings, this SPACE set it is also very well priced. We extend our sincere thanks to Eduard for the review sample. You can visit them on the web at http://www.eduard.com and on Facebook at https://www.facebook.com/EduardCompany/
Haagen Klaus
Scale Modeling News & Reviews Editor
Detail & Scale


