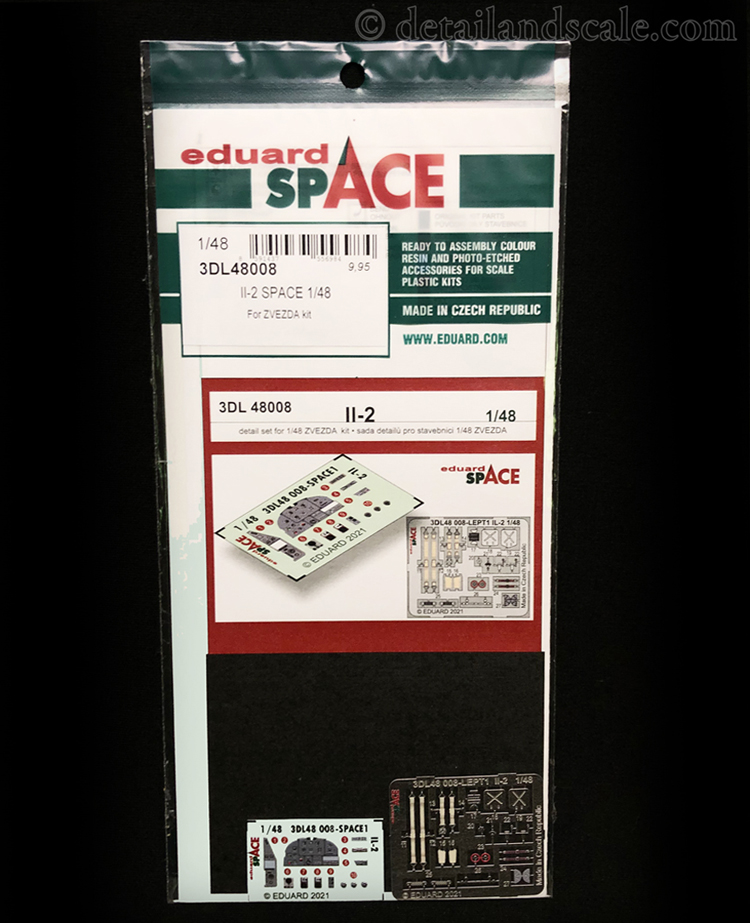
Eduard # 3DL48008 – Il-2 SPACE (for the Zvezda kit)

The 3D printed cockpit detail parts revolution is underway and led by manufactures including Eduard. In 2021, Eduard launched their line of 3D printed detail sets under the new “SPACE” product line. Here, let’s take a look at what they have come up with for the 1:48 scale Zvezda Ilyushin Il-2 Shturmovik kit.
Released in 2020, the 1:48 scale Zvezda Ilyushin Il-2 Shturmovik has been very well received by the scale modeling community as an excellent kit of this famous WWII Soviet ground-attack aircraft. Just out of the box, the kit’s cockpit is pretty good, yet some details are somewhat simplified. This set aims to provide super-detailed parts to elevate the quality of the IL-2 cockpit to a higher level.
Here, (Il-2 SPACE, #3DL48008; MSRP: $9.95), the scale modeler will find twelve 3D printed parts on a section of decal sheet and twenty-two additional photoetched metal parts on a single fret. The 3D printed parts include all the elements for the pilot’s instrument panel side consoles, throttle quadrant, and sidewall details. The photoetched metal fret contains parts for the shoulder harnesses, lap belts, and various other small cockpit details. It is all relatively simple, but also quite effective.
This set is going to be hard to beat. The set represents a complete cockpit upgrade, and the quality of 3D printing is excellent – on par with Quinta Studio and Red Fox. All the buttons and switches are represented as finely raised features, and various instrument dial faces contain high-resolution printed details. Each glass dial face is treated with Eduard’s “glass effect” to produce a perfectly smooth and glossy surface. The SPACE line also combines these 3D parts with Eduard’s photoetched metal parts which cover those items or details best represented by that medium. It’s a winning combination.
Notes on working with 3D parts: these are polymerized vinyl parts, printed directly onto a piece of traditional decal paper. First, and just like using photoetched parts, one must often remove kit cockpit details and sand panels and consoles smooth. Second, dip these parts in water as a traditional water-slide decal. They will soon slide off the decal paper and be ready to put in place. Since these are thick “decals” made out of vinyl, they are best affixed to the kit parts using a PVC-type glue, a little Future/Pledge floor wax, Tamiya X-22, Microscale’s Metal Foil adhesive, or superglue applied with a thin micro-loop. The smaller 3D decal parts are more amenable to being affixed using just a little superglue. DO NOT use standard decal setting or solvent solutions, as they will dissolve the part and nobody wants to see that.
For the value and detail that it brings, this SPACE set it is very well priced. We extend our sincere thanks to Eduard for the review sample. You can visit them on the web at http://www.eduard.com and on Facebook at https://www.facebook.com/EduardCompany/
Haagen Klaus
Scale Modeling News & Reviews Editor
Detail & Scale


